VoltPro lets you import a spreadsheet of line items directly into an estimate. Use it when you already have your estimate prepared in Excel, Google Sheets, or a takeoff tool, and want to skip retyping each row by hand.
Before You Begin
- The importer adds new line items to the current estimate. It does not update or replace existing items.
- Required field: Item Name
- Optional fields: Description, Section, Type, Unit Amount, Markup, Quantity
- Each import is scoped to a single estimate.
Open the Spreadsheet Importer
There are two ways to open the importer from inside the estimate editor:
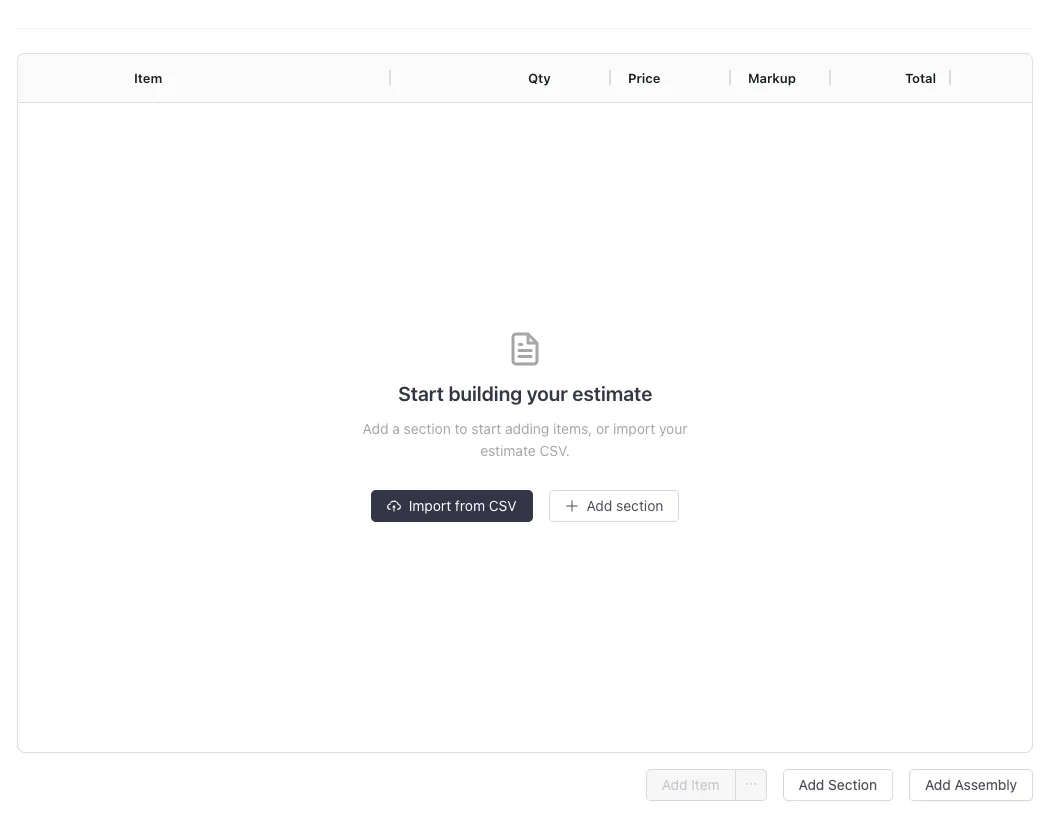
- From an empty estimate. If the estimate has no line items yet, the items table shows an empty state with an “Import from CSV” button next to “Add section”. Click it to open the importer.
- From a section’s add-item menu. Inside any section, open the “Add item” dropdown and select “Import from CSV”. It appears below the standard add options (Item, Service, Custom Material).
Both routes open the same 3 step modal: Upload CSV, Map Columns, and Import.
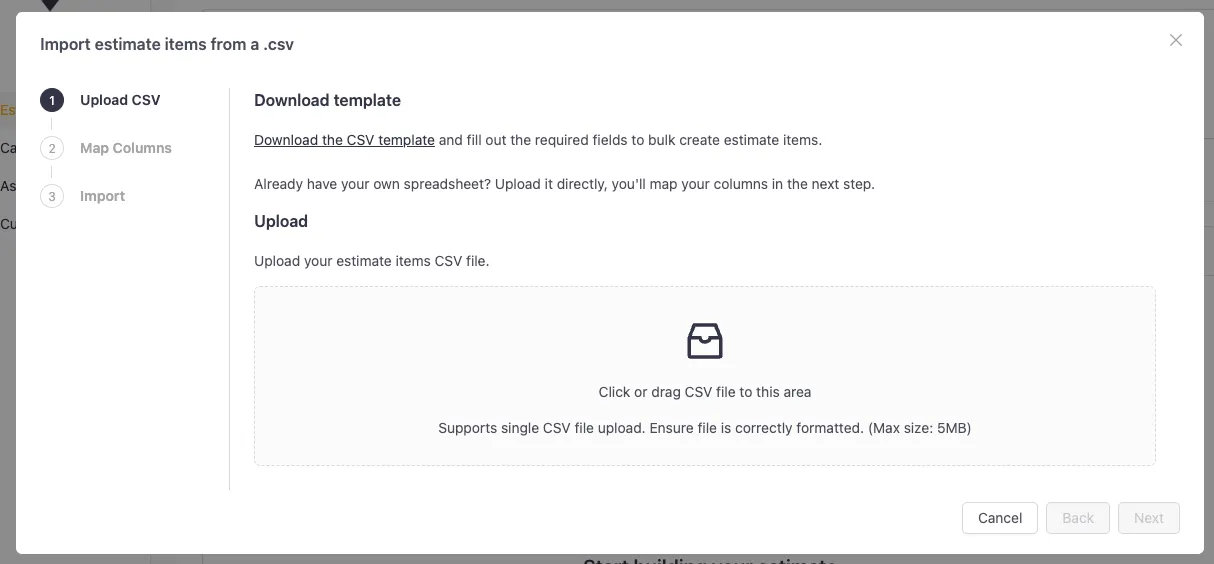
Step 1: Upload Your Spreadsheet
- In the importer, click “Download CSV template” if you want to start from VoltPro’s recommended format.
- If you already have your own spreadsheet, you can upload it as-is. You will map your columns to VoltPro fields in the next step.
- Drag and drop your CSV onto the upload area, or click to choose a file.
- Once the file uploads, click “Next” to move to column mapping.
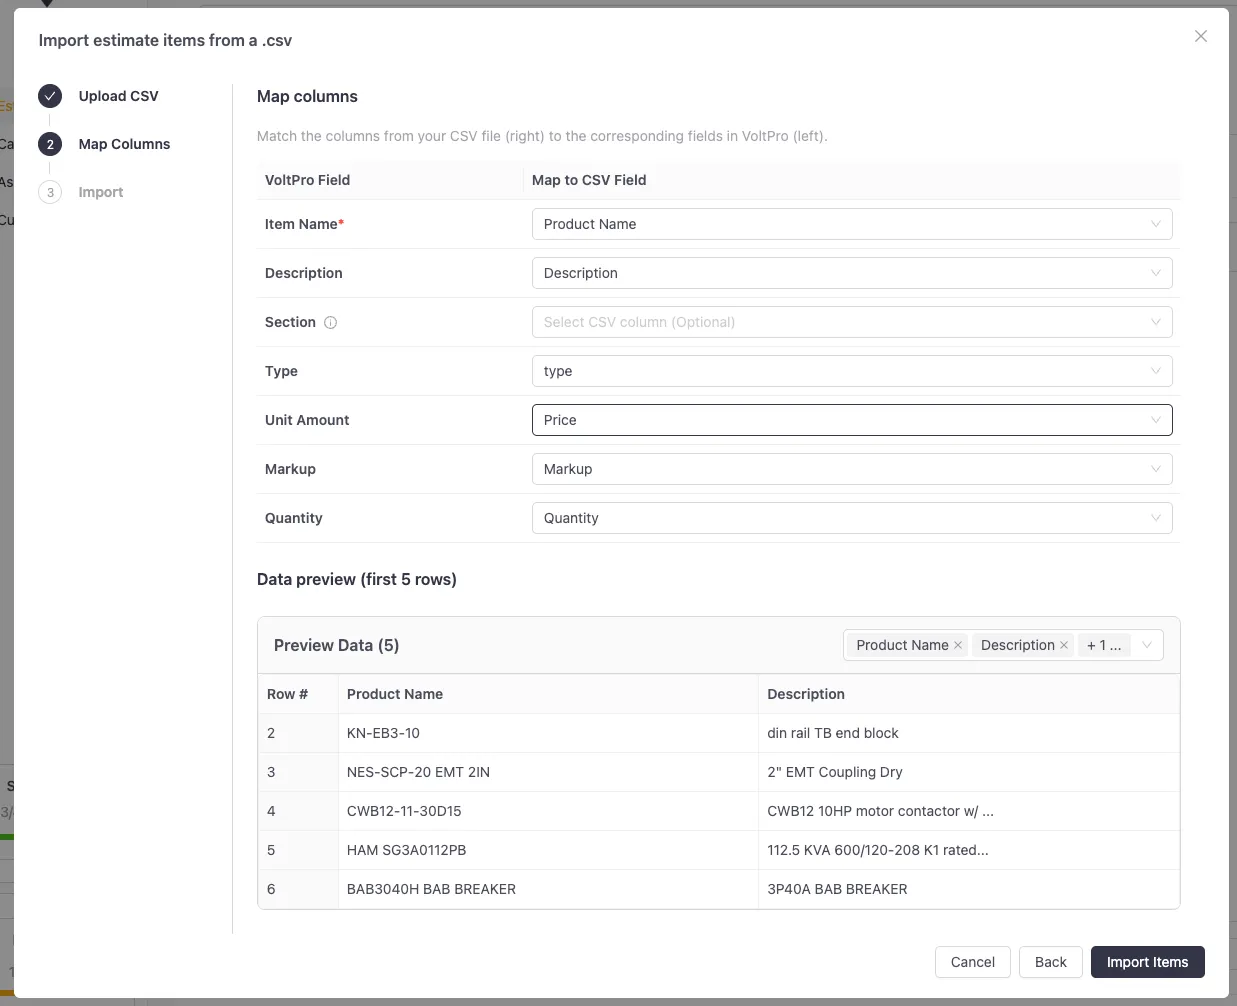
Step 2: Map Your Columns
VoltPro reads the headers and a preview of the rows from your spreadsheet, then asks you to match each VoltPro field to a column from your file.
- For each VoltPro field, select the matching column from the dropdown.
- Required fields must be mapped before you can continue. The “Import Items” button stays disabled until every required field has a column assigned.
- Use the data preview below the mapping controls to sanity-check your selections. The preview shows the first several rows of your spreadsheet with your current mapping applied, so you can see how each row will be interpreted before importing.
The fields you can map are:
- Item Name (required). The name shown on the estimate line item.
- Description. Additional detail for the line item.
- Section. Groups rows under a section heading on the estimate. Rows that share the same section name will be grouped together. If a section name in your spreadsheet does not yet exist on the estimate, VoltPro will create it. If you do not map a Section column, every row will land in a section called “Imported Items”.
- Type. The item type.
- Unit Amount. The unit price for the item.
- Markup. The markup percentage applied to the item.
- Quantity. The number of units for the row.
When the mapping looks right, click “Import Items” to start the import.
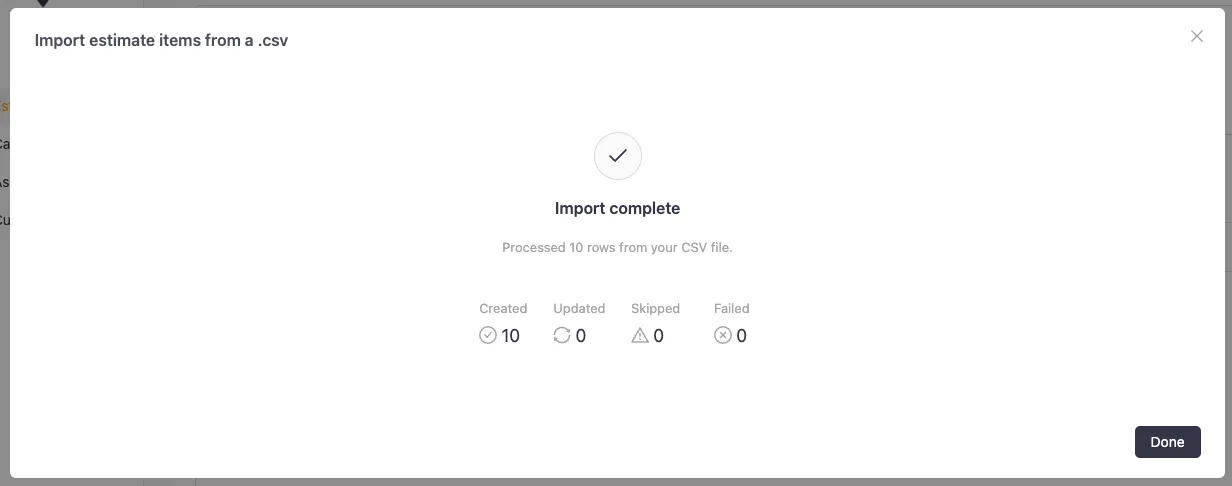
Step 3: Run the Import
- A progress bar shows the import status as VoltPro processes your rows.
- The import runs in the background, so you can close the modal and keep working on the estimate. It will continue running on the server.
- When the import finishes, the modal shows a result banner with the totals: total rows, processed, skipped, and failed.
- Skipped rows are listed in a preview table inside the modal, with the reason each row was skipped.
- Failed rows are listed in their own preview table. Click “Download failed rows” to export just those rows as a CSV, fix them in your spreadsheet, then re-upload the corrected file.
- After a successful import, the estimate’s totals are recalculated automatically and the items grid refreshes with the new line items.
Tips for Successful Imports
- Use the template when you can. It already has the column headers VoltPro expects, which makes mapping faster.
- Group rows with the Section column. If your spreadsheet has a section or category column, map it. Otherwise everything will land under “Imported Items” and you will need to move rows manually.
- Check the preview before importing. The mapping step shows real rows from your file. If the values look wrong (for example, a price column mapped to Quantity), fix the mapping before clicking “Import Items”.
- Re-upload only the failed rows. When some rows fail, download the failed rows CSV, correct the problem rows, and re-upload that smaller file rather than the whole sheet.
Troubleshooting
- The Import Items button is disabled. A required field is not mapped. Check that Item Name has a column selected in the mapping step.
- All my items landed in “Imported Items”. The Section field was not mapped. Re-open the importer and map your section column to the Section field.
- Some rows were skipped. Open the skipped rows preview in the modal to see the reason for each. Skipped rows are not exported, so make any corrections in your original file before re-uploading.
- Some rows failed. Click “Download failed rows” to export them, fix the issues in your spreadsheet, and re-import the corrected file.