VoltPro’s CSV import feature allows you to quickly add multiple materials to your catalog at once. This guide will walk you through the process step-by-step.
Before You Begin
- Download the recommendedtemplateand prepare your CSV file with your materials data.
- Required fields: Product Name and Price
- Recommended fields: SKU, Description, Category, Vendor/Distributor
- Maximum file size: 2MB
Upload Your CSV File
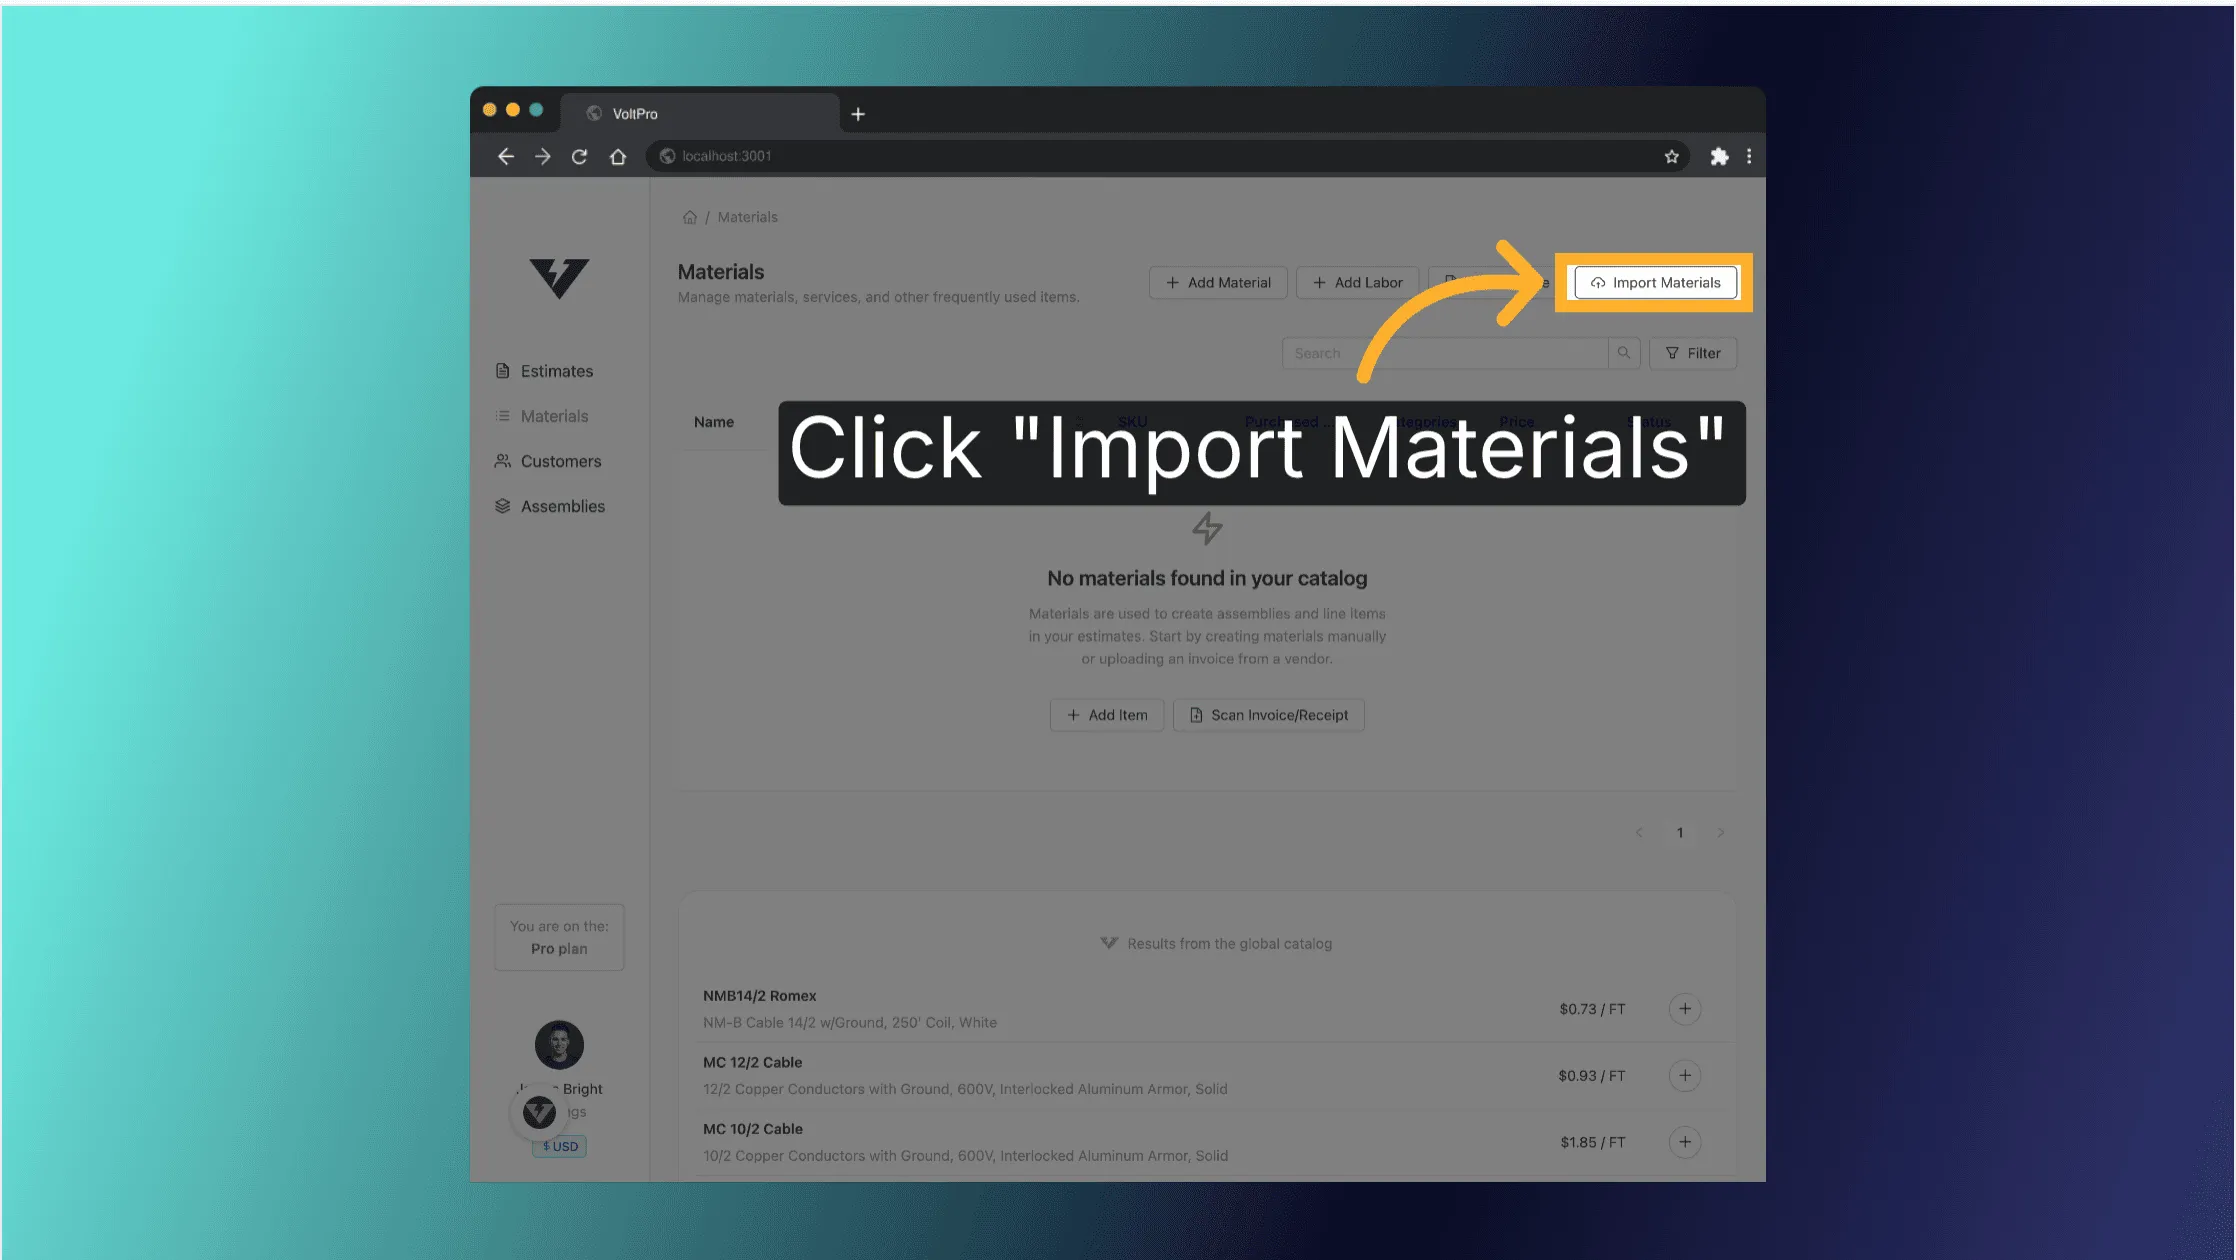
- Access the CSV Import Tool
- Click on “Materials” in the left navigation menu
- Look for the “Import” button near the top-right corner
- Select “Import from CSV” from the dropdown menu
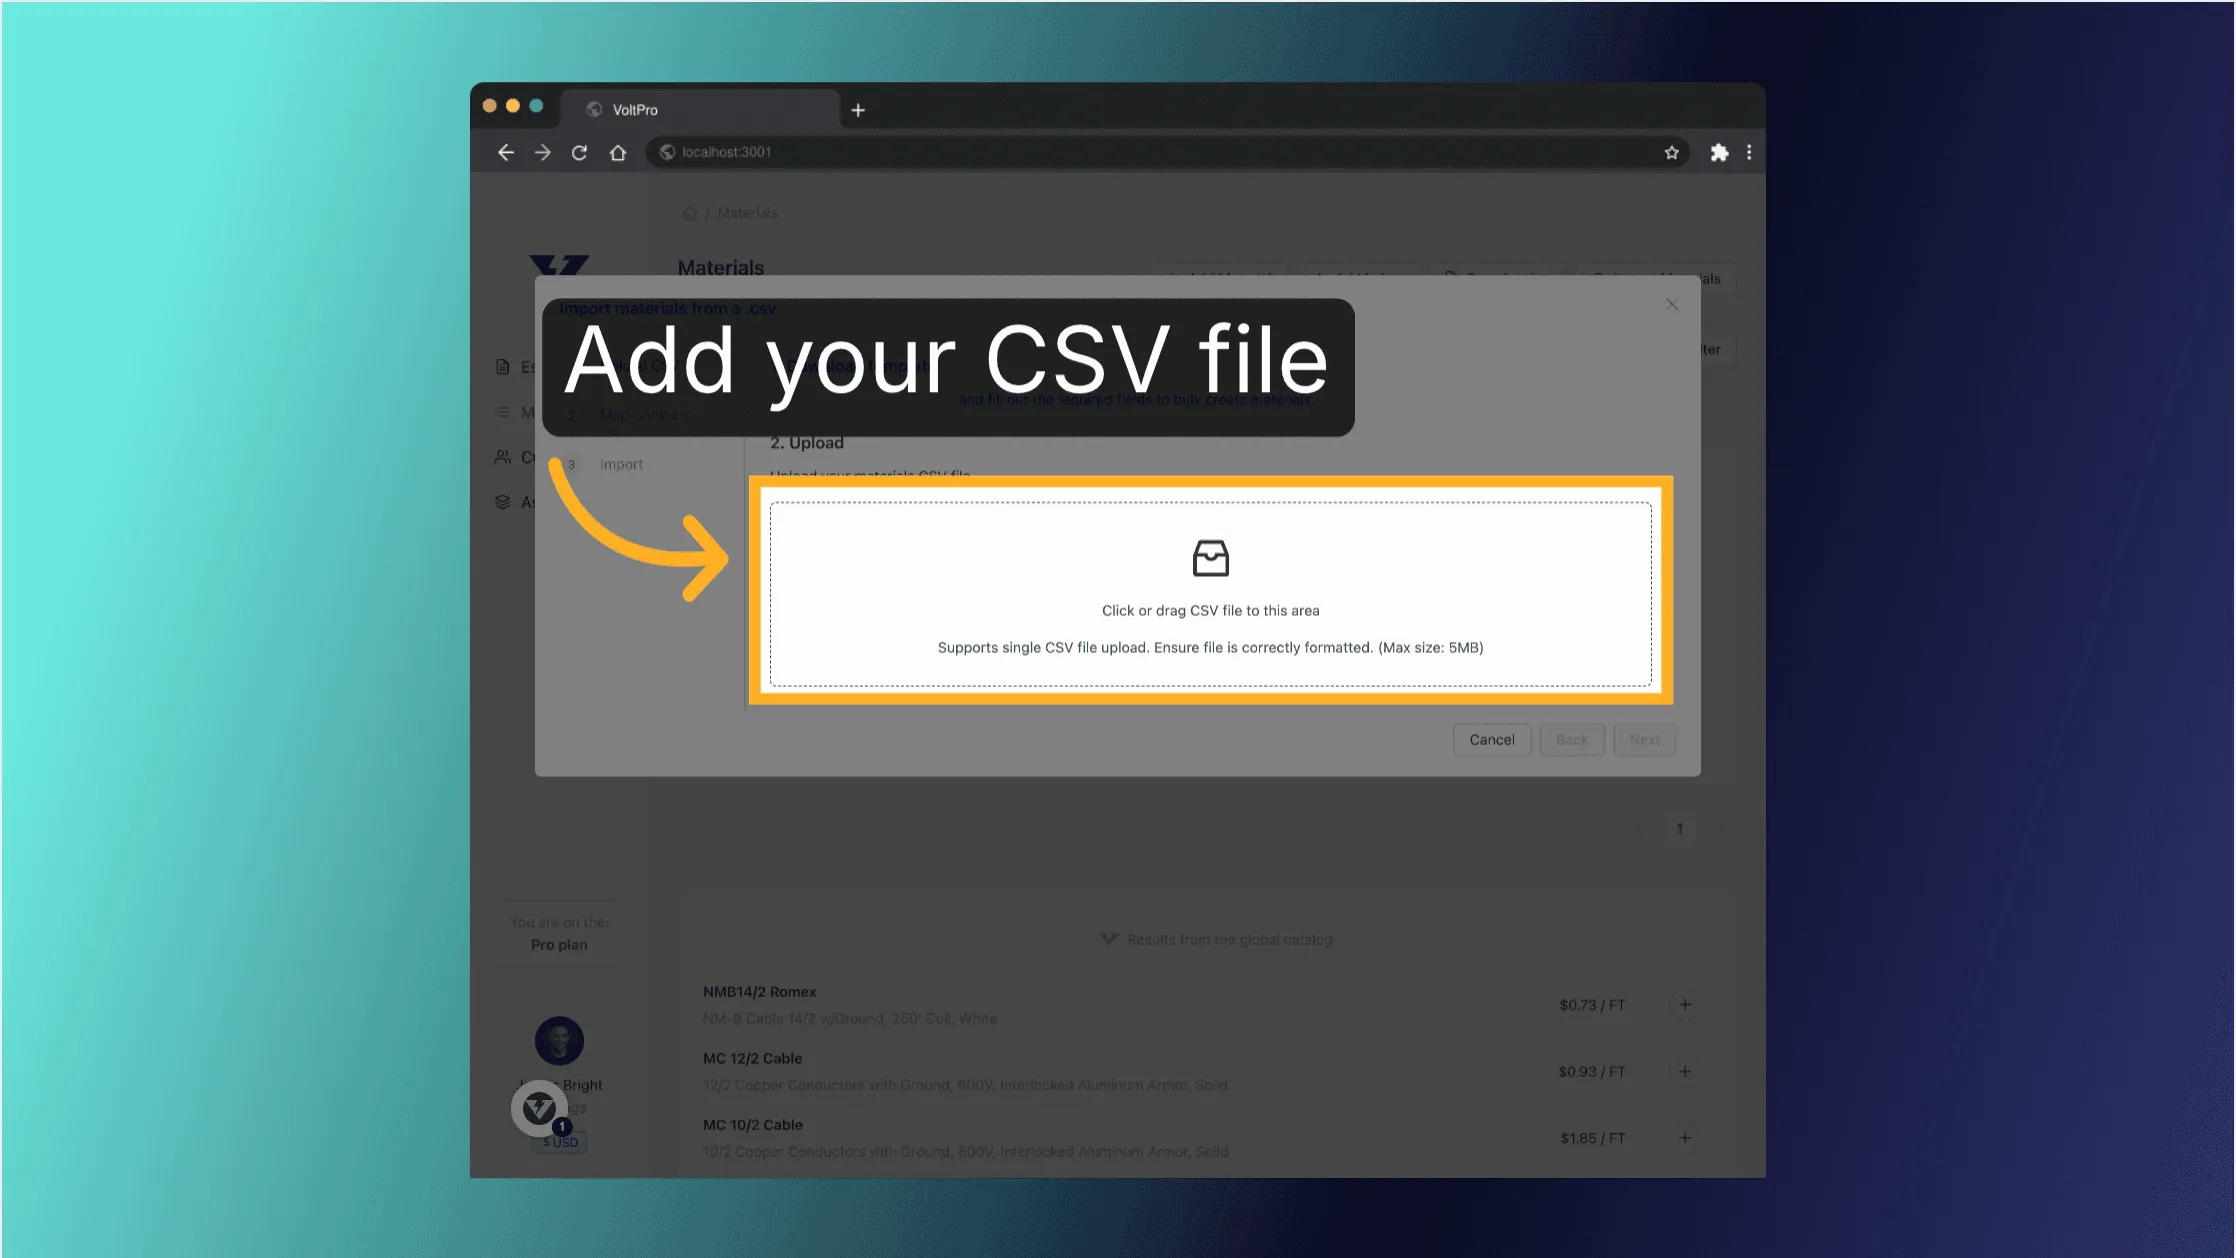
- Upload your CSV File
- In the CSV Import modal, click “Upload File” or drag and drop your CSV file
- VoltPro will validate your file format
- If your file is valid, you’ll see a confirmation with the file name and size
- Click “Next” to proceed to the mapping step
- Map your CSV Columns
- The mapping step is where you tell VoltPro which columns in your CSV correspond to which fields in the system.
- For each VoltPro field listed on the left, select the corresponding column from your CSV using the dropdown
- Required fields (marked with *) must be mapped:
- Product Name
- Price
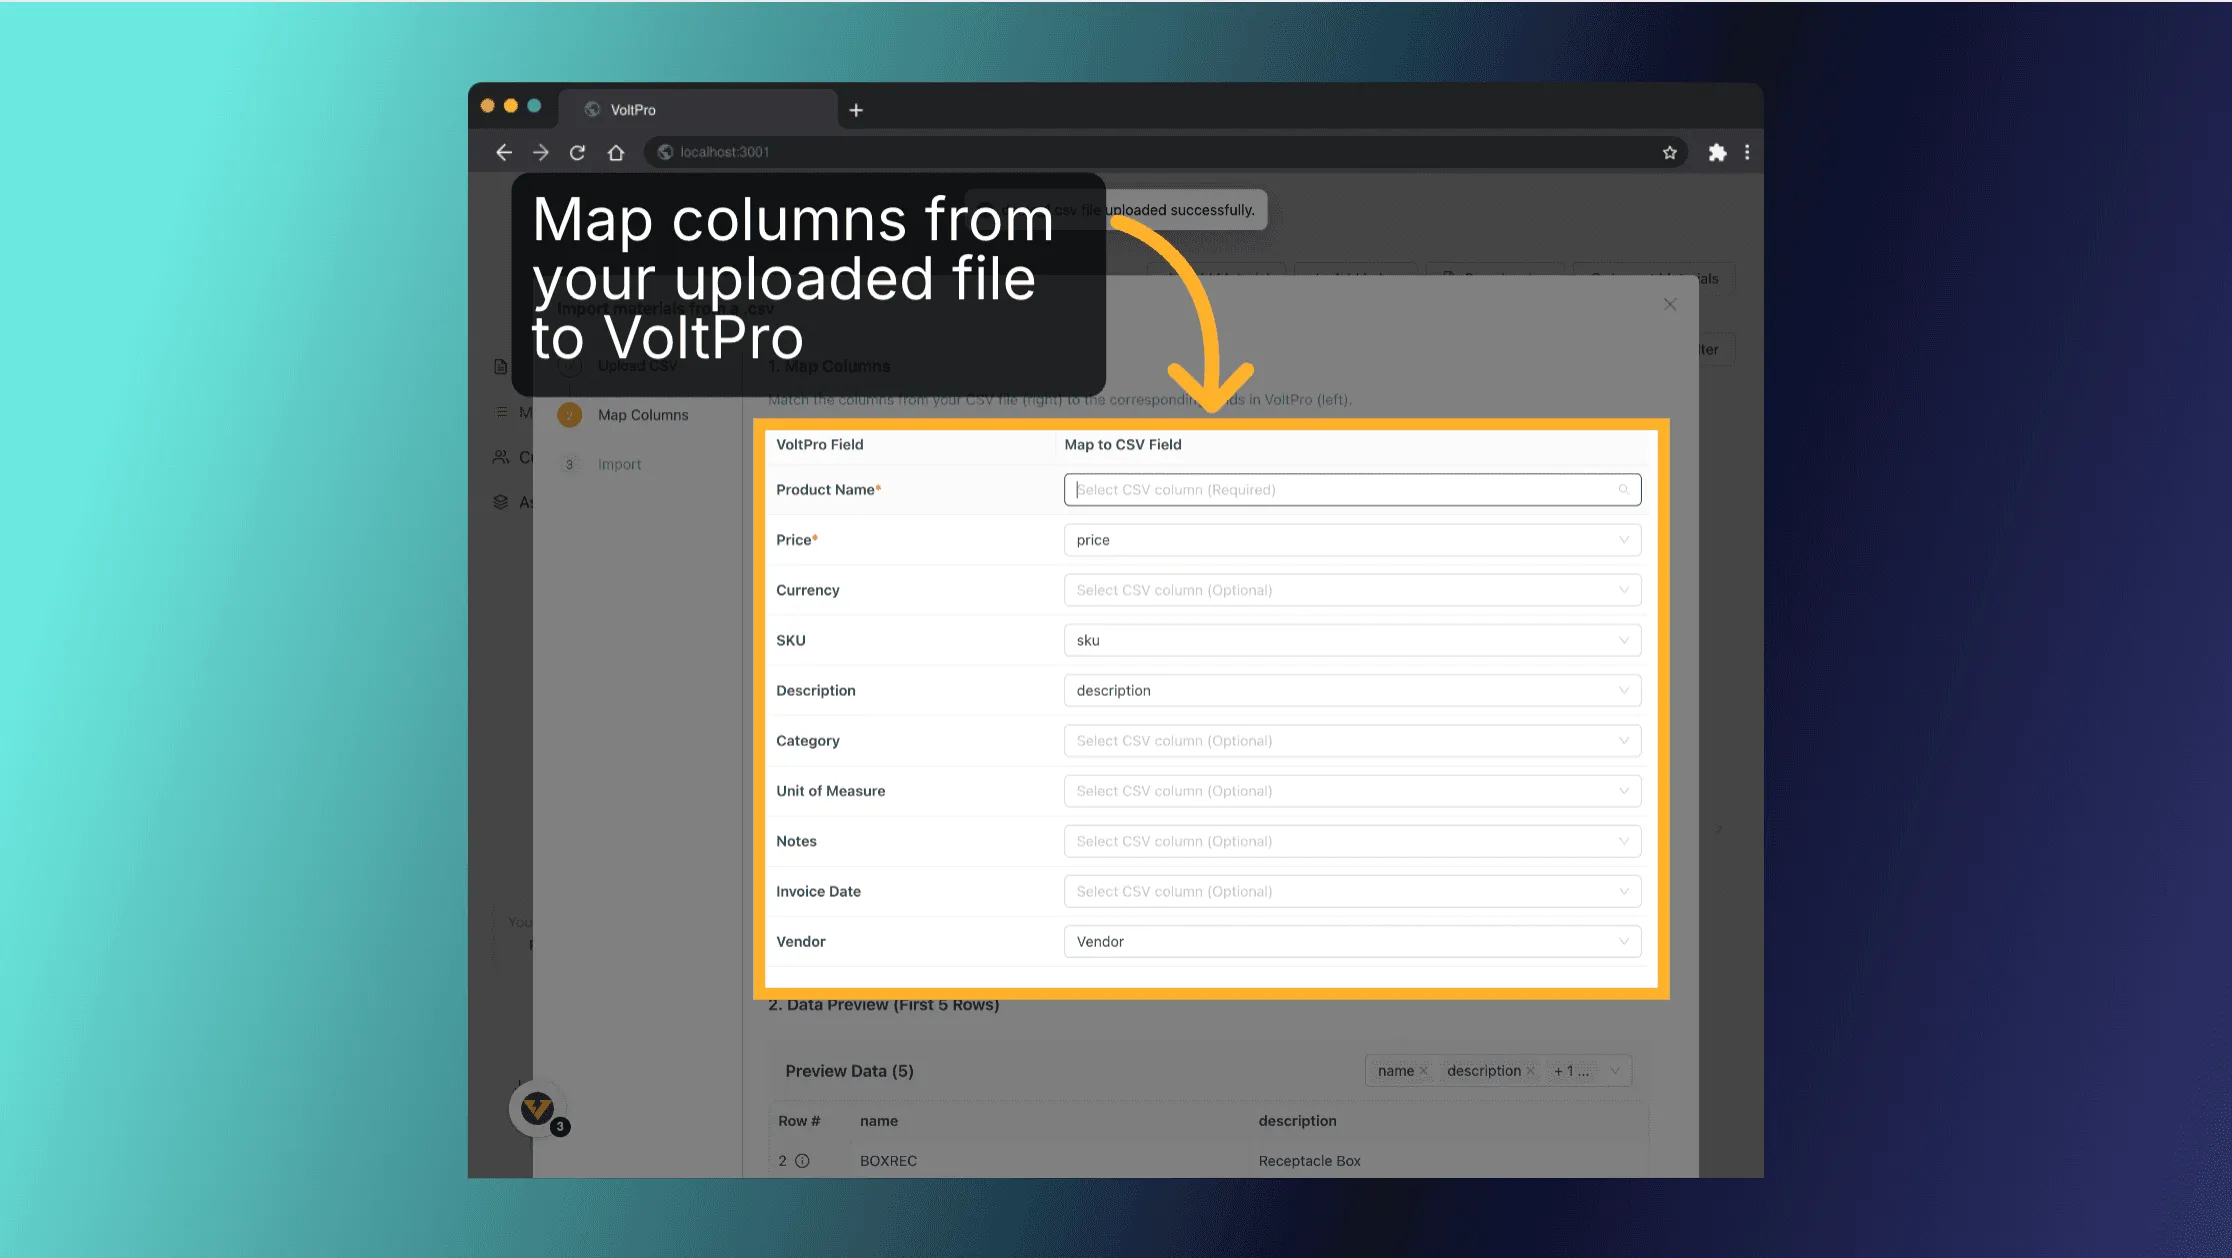
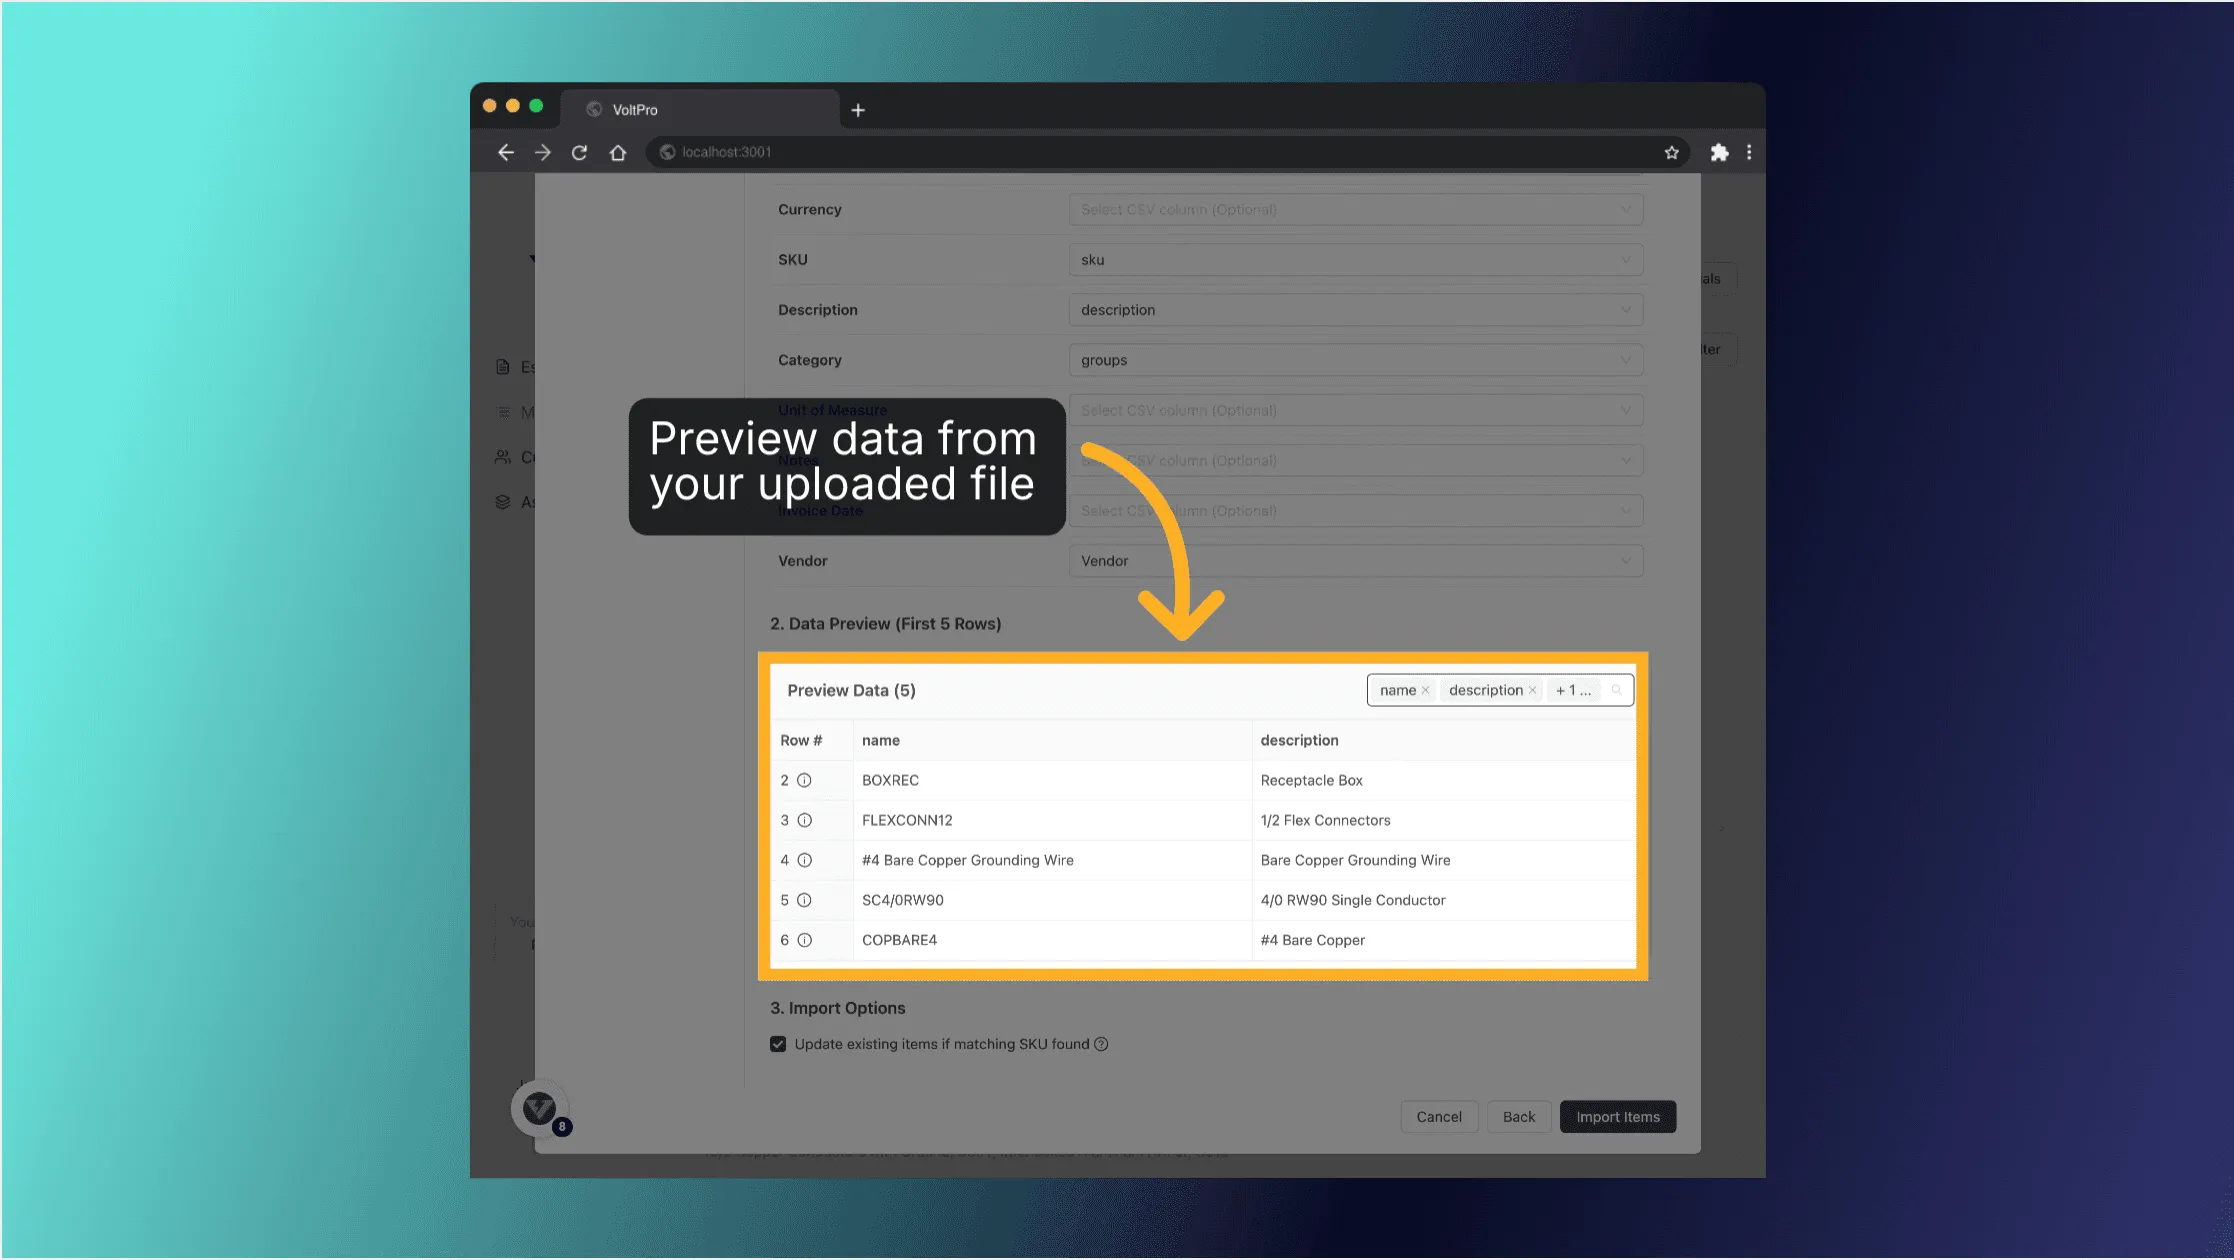
- Preview data shows how your CSV data will be interpreted
-
Options:
-
“Update existing products” - Enable to update materials with matching SKUs instead of creating new ones
-
Click “Next” to initiate the import
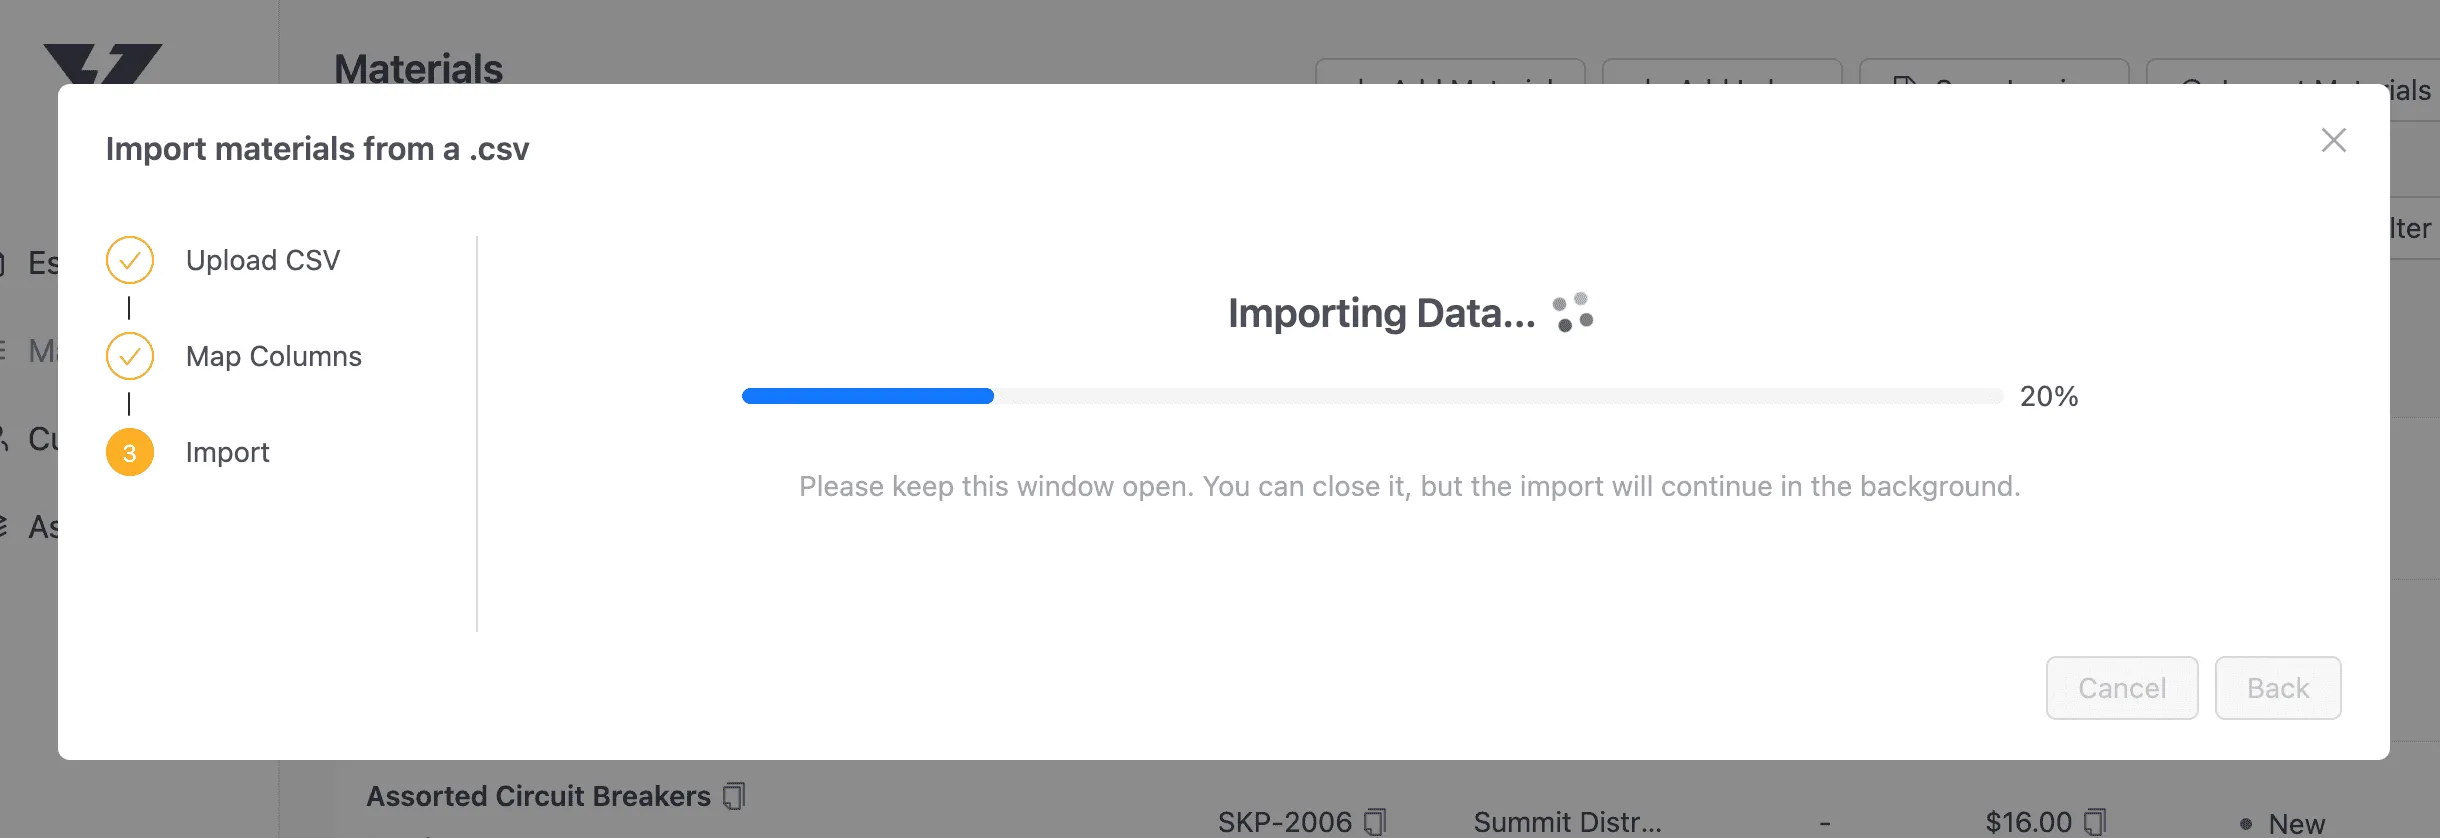
- Monitor the import progress
- The import will begin processing your data
- A progress bar shows the current status
- You can keep the window open to monitor progress or close it (the import will continue in the background)
- When complete, you’ll see a summary of the results:
- Total rows processed
- Successfully created items
- Updated items (if applicable)
- Skipped rows
- Failed rows
- Review results and handle errors
-
The import will begin processing your data
-
A progress bar shows the current status
-
You can keep the window open to monitor progress or close it (the import will continue in the background)
-
When complete, you’ll see a summary of the results:
-
Total rows processed
-
Successfully created items
-
Updated items (if applicable)
-
Skipped rows
-
Failed rows
-
If there were any skipped or failed rows, they will be displayed in tables
-
Common reasons for failed rows:
-
Missing required data
-
Data validation errors
-
System errors
-
For detailed error information:
-
Review the “Error Reason” column
-
Download the failed rows report for offline review
-
Fix the issues in the failed rows report and re-import just those rows
-
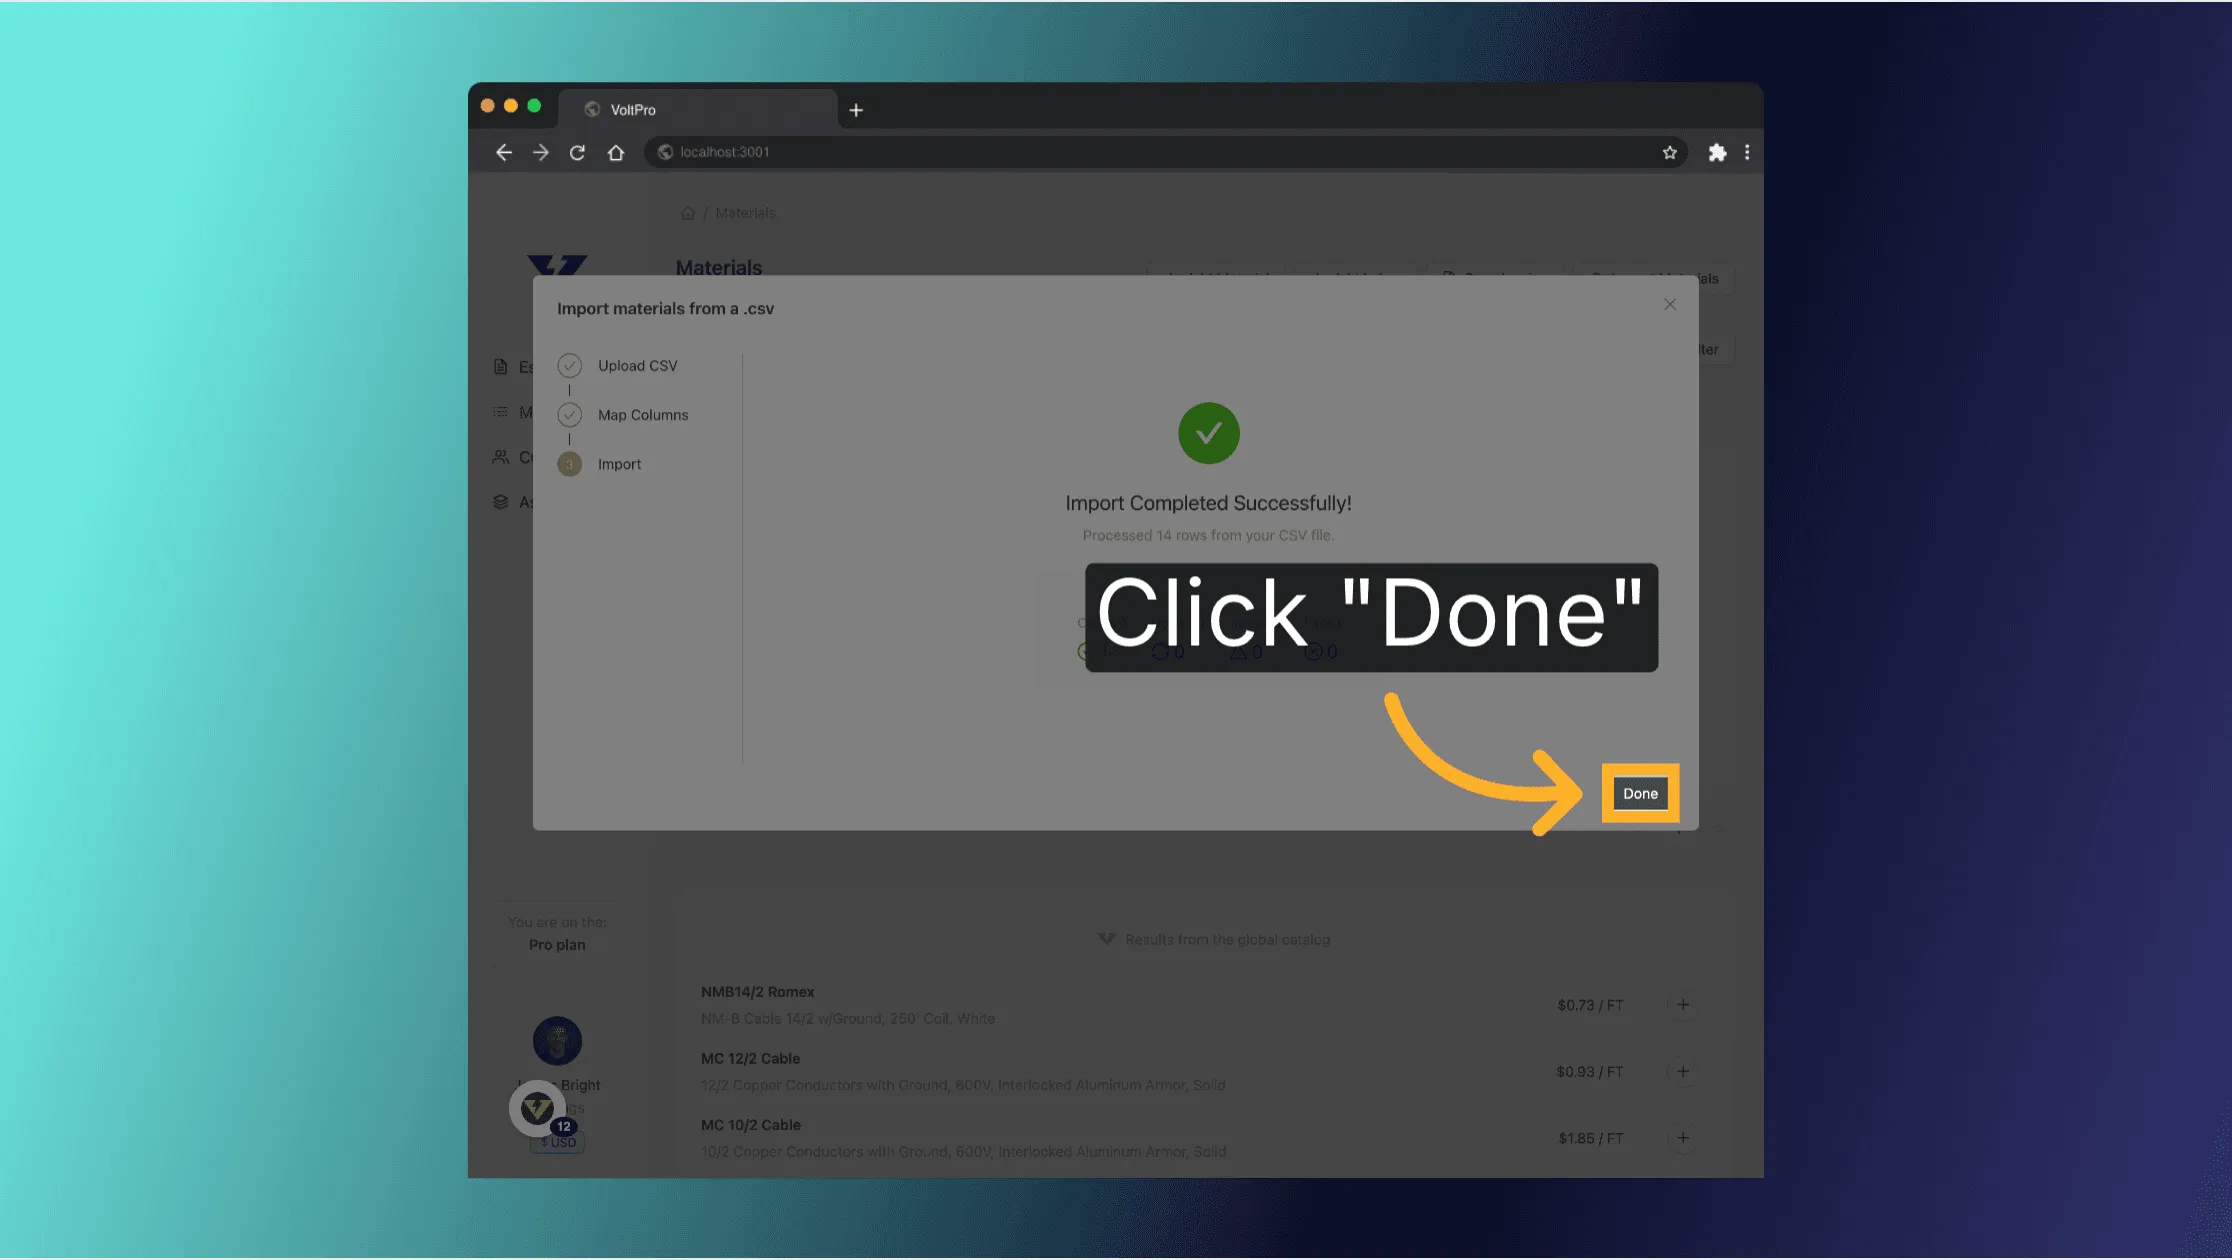
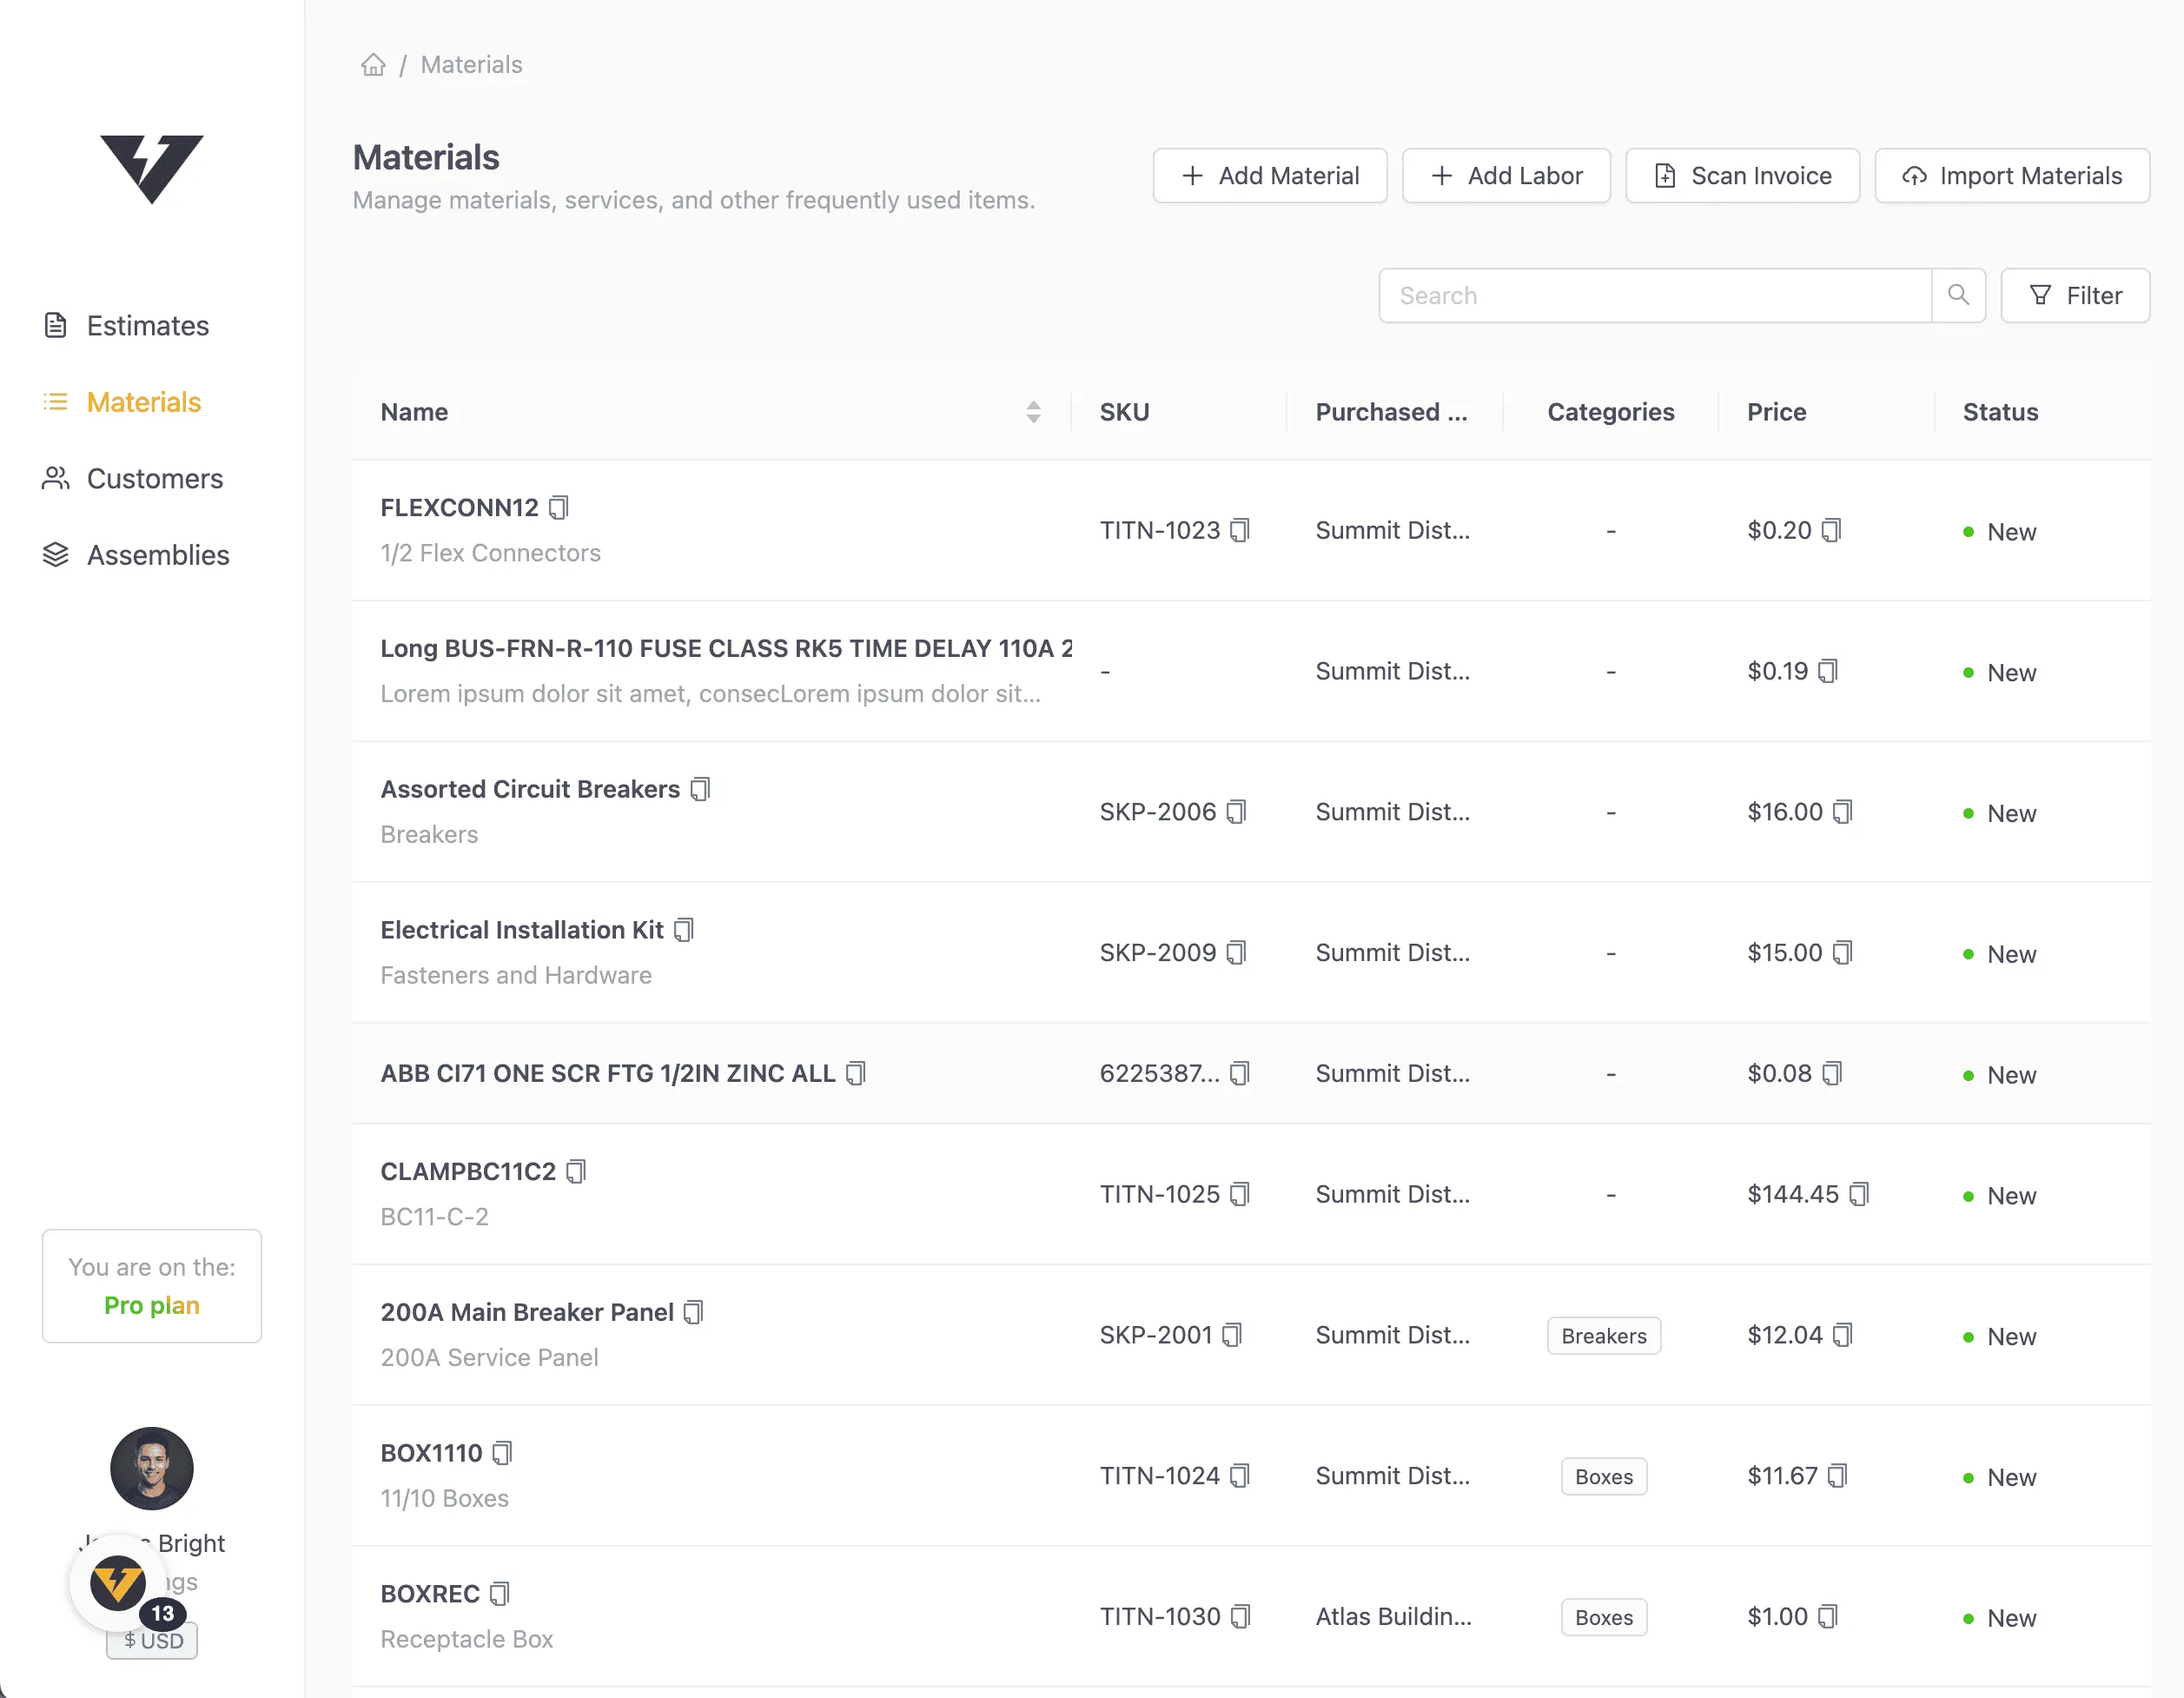
When complete, click ‘Done’ and see the created materials
Tips for Successful Imports
- Use our template:Download our CSV templatefor the correct format
- Check your data: Ensure prices are in the correct format (numbers only)
- SKUs: Use unique SKUs to avoid duplicates
- Categories: Use existing category names exactly, otherwise the system will create new categories
- Vendors/Distributors: Use existing vendor names exactly, otherwise the system will create a new vendor
- Special characters: Avoid special characters in names and descriptions. These could throw validation errors
- Large imports: For very large catalogs, consider importing in smaller batches
Troubleshooting
- File not uploading: Ensure your file is under 2MB and in CSV format
- Mapping issues: Check that your CSV has headers that match your data. Headers should only be present on the first row. Ensure the first row is not empty.
- Failed imports: Review the error messages and fix the specific issues in your data
- Timeout errors: For large files, try breaking into smaller files and import them separately